In this post, I'll show you how to add an SQLite database to an ASP.NET Core API (in this case .NET 5) to develop this API and run unit tests in a shorter time as possible. SQLite. For the communication between API and the database, I'll use Entity-Framework.
In this post, we're going to set up SQLite in an ASP.NET Core API.
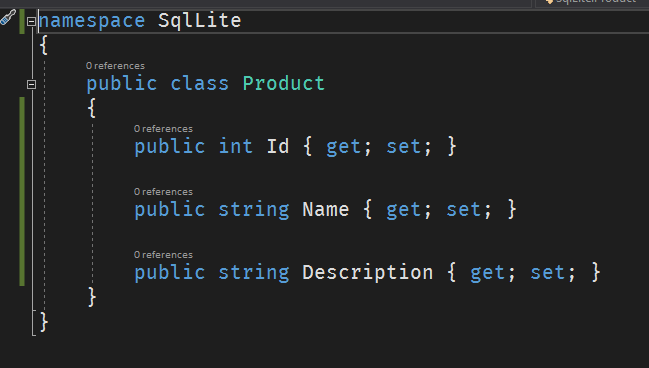
SQLite is very useful for example in unit tests, to make this the fastest as possible. To make this post simple, I'm not going to set up unit testing, but the process is the same. The first step is to install the packages "Microsoft.Data.Sqlite.Core" and "Microsoft.EntityFrameworkCore.Sqlite". Create a class model "product", like the following:

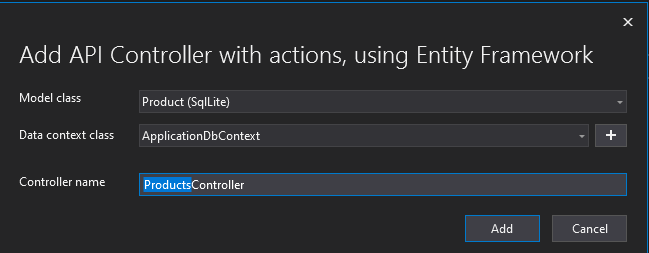
Next, create a controller in Visual Studio with actions, using Entity Framework.

Select the model (Product), create a new DataContext, name it for example ApplicationDbContext and name the controller ProductsController

This will install some new additional packages.
After the installation on the Startup file, it was added the service for our ApplicationDbContext, but using SqlServer. You can remove it.
We need to create a method to create, open, and return a connection, like the following:

Now in the ConfigureService method, let's use the created helper. Replace the default DbContext service requirement if you didn't remove it, with the following code:

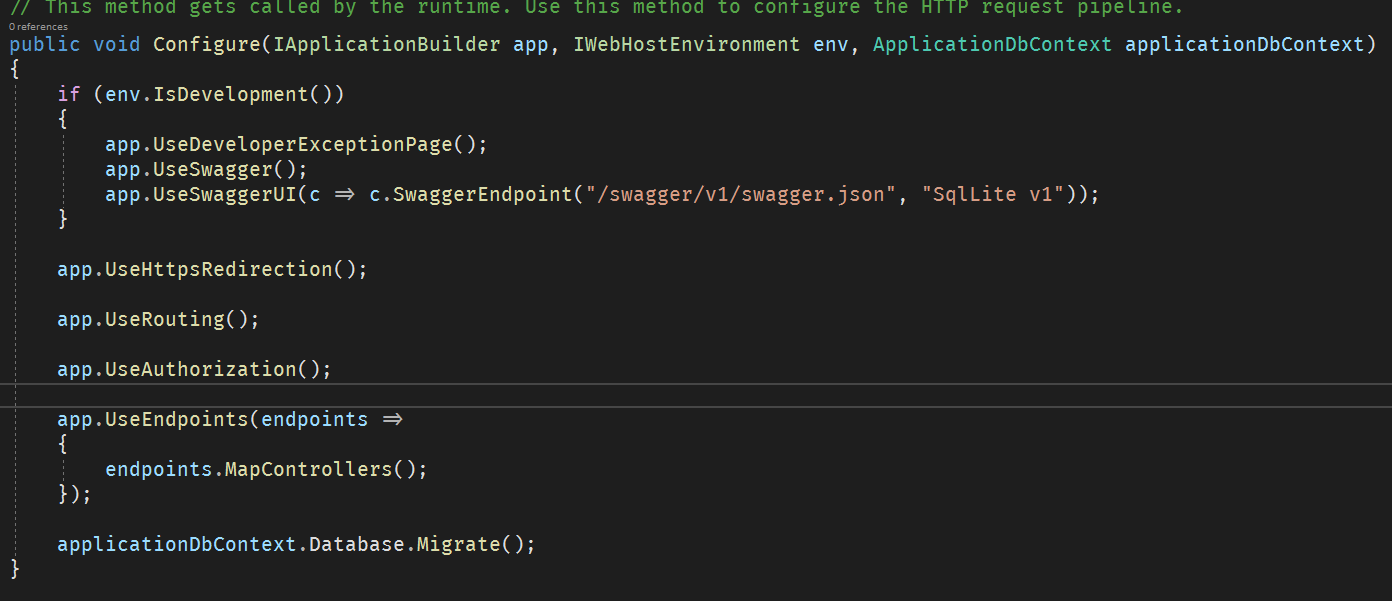
The next step is to create the migration for the product entity. Run the command "Add-Migration Initial" on Package Manager Console. To use this migration, we need to run it on startup. Update the Configure method like this:

It's time for testing! Run the application, and go to the swagger page and insert a product (without the id). If you run the GET service you will see the product.

The response time is very low! You can use SQLite for development too, instead of running against a real database.
You can find the repo on my GitHub
Hope you enjoyed it and learned something new!
Header image from Unsplash